Krups offers diverse espresso machines, from fully automatic to manual models, catering to varied preferences. Initial setup and understanding the manual are crucial for optimal performance.
Understanding Krups Espresso Machine Models
Krups presents a spectrum of espresso machines, ranging from user-friendly, fully automatic options like the Evidence and Flair series, to more hands-on, manual lever machines. The EA8908, for instance, is praised for its ease of use, bridging the gap for those hesitant about traditional espresso preparation. Conversely, models like the EA877D10 sometimes require a demo mode reset upon initial purchase, highlighting model-specific quirks.
Understanding your specific model’s manual is paramount. Each machine boasts unique features, cleaning protocols, and troubleshooting steps. Familiarizing yourself with these details ensures longevity and consistently delicious results.
The Popularity of Krups Espresso Machines
Krups espresso machines enjoy widespread popularity due to their blend of affordability, functionality, and stylish design. Many users, initially intimidated by espresso-making, find Krups models, like the Evidence line, accessible. However, issues like demo modes on the EA877D10 or water leaks in the EA81 demonstrate the importance of consulting the manual.
Positive user experiences, coupled with readily available parts and support, contribute to brand loyalty. Thoroughly reading the manual is key to navigating potential issues and maximizing enjoyment.

Setting Up Your Krups Espresso Machine
Proper setup, guided by the manual, is essential. This includes initial cleaning cycles, water reservoir filling, and filter installation for optimal brewing performance.
Initial Machine Preparation
Before your first brew, carefully review the Krups espresso machine manual. Remove all packaging materials and ensure all parts are present. Rinse the water reservoir and drip tray thoroughly with clean water. Perform a cleaning cycle, as detailed in the manual, to flush out any manufacturing residue. This initial preparation is vital for ensuring a clean, fresh taste in your first cup and prolonging the machine’s lifespan. Familiarize yourself with the control panel and various functions before proceeding.
Water Reservoir and Filter Installation
Consult your Krups espresso machine manual for specific instructions. Carefully remove the water reservoir and fill it with fresh, filtered water to the maximum fill line. Insert the water filter, if applicable, following the manual’s diagram – this improves water quality and taste. Ensure the reservoir is securely locked into place. Proper installation prevents leaks and ensures consistent brewing. Regularly replace the filter as recommended in the manual for optimal performance and machine longevity.
First-Time Use and Cleaning Cycle
Before your first brew, thoroughly rinse the Krups espresso machine according to the manual. Run several cycles with only water, without coffee grounds, to cleanse the internal components. This removes any manufacturing residue. The manual details a specific cleaning cycle – follow it precisely. Discard the water after each cycle. This initial cleaning ensures a pure coffee flavor and prepares the machine for consistent, high-quality espresso. Refer to your manual for descaling frequency.
Operating Your Krups Espresso Machine
Krups machines, guided by the manual, offer intuitive controls for brewing espresso and steaming milk. Familiarize yourself with each function for optimal results.
Powering On and Basic Controls
Refer to your Krups espresso machine manual for specific instructions, as controls vary by model. Generally, locate the power button – often on the side or front. Upon powering on, the machine may initiate a warming-up phase, indicated by lights or a display.
Basic controls typically include buttons for espresso brewing, steam wand activation, and hot water dispensing. The manual will detail the function of each button and any associated indicator lights. Some models feature a control knob or touchscreen for selecting options like coffee strength or volume. Always consult the manual before operating.
Brewing Espresso
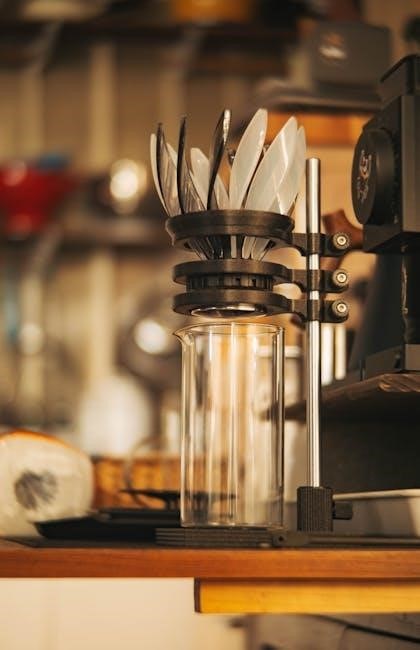
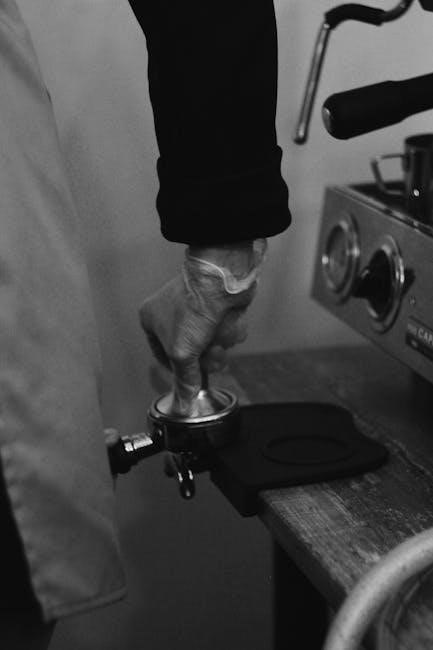
Consult your Krups espresso machine manual for precise brewing instructions. Typically, fill the portafilter with finely-ground coffee, ensuring it’s level and tamped firmly. Lock the portafilter into the brew group. Select your desired espresso volume using the machine’s controls, as detailed in the manual.
Initiate the brewing process by pressing the espresso button. The machine will force hot water through the coffee grounds, extracting a rich espresso. The manual will explain how to adjust brewing parameters for optimal results. Remember to always refer to the manual for model-specific guidance.
Steaming Milk for Cappuccinos and Lattes
Refer to your Krups espresso machine manual for detailed milk steaming instructions. Purge the steam wand to remove any condensation. Submerge the wand’s tip just below the milk surface and introduce air to create microfoam – the manual illustrates proper technique.
Lower the wand deeper to heat the milk, swirling the pitcher. The manual specifies ideal milk temperature. Once steamed, tap the pitcher to remove large bubbles. Practice, guided by the manual, is key to achieving velvety, textured milk for perfect cappuccinos and lattes.

Maintenance and Cleaning
Regular cleaning, as detailed in your Krups espresso machine manual, is vital. Descaling and brew group cleaning ensure longevity and optimal coffee flavor.
Daily Cleaning Procedures
Following your Krups espresso machine manual, daily cleaning is essential for consistent performance. Immediately after each use, empty the drip tray and grounds container. Wipe down the exterior with a damp cloth. The brewing unit should be rinsed under running water, removing any coffee residue. Ensure the steam wand is purged and wiped clean after each milk frothing session to prevent clogging. Regularly inspect and clean the water tank to maintain water quality and prevent scale buildup, extending the machine’s lifespan and ensuring flavorful brews.
Descaling Your Krups Machine
Consult your Krups espresso machine manual for descaling instructions, typically every 3-6 months, depending on water hardness. Use a descaling solution specifically designed for coffee machines. Run the solution through a full brewing cycle, followed by several clear water cycles to rinse thoroughly. Descaling removes mineral buildup, preventing damage and ensuring optimal heating and brewing temperatures. Ignoring descaling can lead to reduced performance, bitter coffee, and potential machine failure, so adhere to the recommended schedule.
Cleaning the Brew Group
Refer to your Krups espresso machine manual for detailed brew group cleaning instructions. Typically, this involves removing the brew group and rinsing it under running water, removing any coffee grounds. Some models require a dedicated cleaning tablet and cycle. Regular cleaning—weekly is recommended—prevents coffee oil buildup, ensuring optimal espresso extraction and flavor. A clean brew group is vital for consistent performance and extends the lifespan of your machine, preventing blockages and maintaining hygiene.
Troubleshooting Common Issues
Consult your Krups espresso machine manual first! Issues like leaks or power failures often have simple solutions detailed within, saving time and potential repairs.
Machine Not Powering On
First, verify the power cord is securely connected to both the machine and a functioning outlet. Check the circuit breaker or fuse box to ensure the outlet isn’t tripped or blown. Consult your Krups espresso machine manual for specific power requirements. If the machine still doesn’t power on, examine the power button itself for damage. Some models have a separate on/off switch at the rear; ensure it’s activated. A complete lack of response suggests a potential internal electrical fault, requiring professional service. Do not attempt self-repair in such cases.
Water Leaks
Water leaks often stem from loose connections or damaged seals. Refer to your Krups espresso machine manual for component locations. Inspect the water reservoir, ensuring it’s properly seated and undamaged. Check the hoses connecting the reservoir to the machine for cracks or disconnections. Leaks from the steam wand may indicate worn-out seals; replacement is often necessary. Underneath leaks could signal internal component failure, demanding professional attention. Always unplug the machine before investigating leaks and avoid contact with electrical parts.
Grinder Issues and Coffee Not Brewing
If your Krups isn’t brewing, first consult the manual for grinder settings. Ensure the bean hopper contains sufficient beans and isn’t clogged. Check for obstructions within the grinding mechanism itself. Coffee may not brew if the grind is too fine, causing blockage. Refer to the manual for adjusting grind size. Insufficient tamping pressure can also prevent proper brewing. Verify the brew group is clean and functioning correctly; a blockage here halts brewing.
Advanced Features & Customization
The manual details adjusting grind size, programming coffee strength, and volume. Explore features like the hot water dispenser for teas and other beverages.
Adjusting Grind Size
Consult your Krups espresso machine manual for precise instructions, as methods vary by model. Generally, a finer grind is suitable for stronger espresso, while a coarser grind yields a milder flavor. Experimentation is key to finding your preferred taste. The manual will illustrate the grind settings, often numbered, allowing incremental adjustments. Remember that changing the grind size impacts brewing time; finer grinds require less time, and coarser grinds need more. Regularly check and adjust the grind to maintain consistent coffee quality, especially with changes in bean type or humidity.
Programming Coffee Strength and Volume
Refer to your Krups espresso machine manual to navigate the programming functions. Most models allow customization of coffee strength – typically ranging from mild to intense – by adjusting the amount of ground coffee used per brew. Volume control lets you define the desired espresso shot size, from a short ristretto to a longer lungo. Explore the menu options, often accessed via buttons and a display screen, to personalize your coffee experience. Save your preferred settings for consistent results. Remember to consult the manual for specific button combinations and menu navigation.
Using the Hot Water Dispenser
Consult your Krups espresso machine manual for precise instructions on utilizing the hot water dispenser. Typically, a dedicated button activates this function, delivering heated water ideal for teas or Americanos. Ensure the dispenser is unobstructed before use. Some models allow volume selection, letting you dispense a specific amount of hot water. Be cautious as the water is very hot! Always refer to the manual for safety guidelines and specific model variations regarding operation and cleaning of the dispenser.

Specific Model Troubleshooting (EA8908, EA877D10, EA81, EA9010, EA8901, EA877D)
Refer to your Krups espresso machine manual for model-specific error codes and solutions. Online forums also offer troubleshooting tips for common issues.
EA8908 Specific Issues
The Krups Evidence EA8908 often presents challenges for new users transitioning from traditional methods. Many find the initial learning curve steep, particularly regarding grind size and coffee quantity. Consult the manual for detailed guidance on achieving desired espresso strength. Users report issues with inconsistent brewing if the bean hopper isn’t properly seated. Refer to the manual for proper filling instructions. Additionally, ensure the brewing unit is clean and lubricated as outlined in the Krups manual to prevent blockages and maintain optimal performance. Regular descaling, following manual directions, is also vital.
EA877D10 Demo Mode Reset
The Krups EA877D10 frequently arrives in a demo mode, requiring reset for full functionality; This mode restricts certain features. Consult the machine’s manual for the specific reset procedure, as it varies. Typically, it involves navigating the settings menu and selecting a “disable demo mode” option. If the menu is inaccessible, a specific button combination, detailed in the manual, may be required. Power cycling the machine after attempting the reset is often necessary. Refer to the manual for troubleshooting if the demo mode persists.
EA81 Water Leak from Steam Wand
A water leak from the steam wand on the Krups EA81 often indicates worn or improperly seated seals. The machine’s manual details how to access and replace these seals. Repeated disassembly and reassembly can exacerbate the issue, so careful attention is vital. Ensure the steam wand is fully closed after each use. Consult the manual for diagrams illustrating correct seal placement. If the leak persists after seal replacement, a cracked housing or internal valve malfunction may require professional repair.
EA9010 Frequent Repairs & Replacement
The Krups EA9010, while popular, is noted for requiring frequent repairs, potentially exceeding its value. The user manual outlines basic troubleshooting, but complex issues often necessitate professional attention. Common failures include the brewing unit and pump. Before considering replacement, thoroughly review the manual’s descaling instructions, as mineral buildup contributes to malfunctions. Frequent repairs suggest a potential pattern; assess if the ongoing costs justify a new, more reliable machine.
EA8901 Water Leaks Underneath
The Krups EA8901 is prone to water leaks, often originating from a damaged piston seal. The user manual details disassembly for cleaning, but careful reassembly is vital to prevent leaks. Inspect the seal during routine maintenance. If the leak persists after seal replacement, check the water circuit connections, following the diagrams in the manual. Persistent leaks may indicate internal component failure, requiring professional repair or machine replacement.
EA877D Initial Defects
The Krups EA877D, purchased as “open box,” sometimes arrives with a demo mode activated. The user manual doesn’t explicitly cover this, but a sequence of button presses can often disable it. Initial defects can include language selection loops or operational restrictions. Thoroughly review the manual’s troubleshooting section. If issues persist, contact the retailer for assistance or explore online forums for user-shared solutions before attempting complex repairs.

Krups Espresso Machine Parts & Accessories
The manual details compatible parts. Replacements, like filters and seals, are widely available online. Accessories, such as milk frothing pitchers, enhance the brewing experience;
Where to Find Replacement Parts
Locating replacement parts for your Krups espresso machine is generally straightforward. The Krups official website often provides a parts store or directs you to authorized retailers. Online marketplaces like eBay and Amazon are excellent sources, offering a wide selection of components, frequently at competitive prices. Specialized appliance parts retailers also stock Krups parts.
Always refer to your machine’s model number and the manual when ordering to ensure compatibility. Checking part numbers is vital. Many online retailers offer exploded diagrams to help identify the correct component. Consider reputable sellers to guarantee genuine Krups quality.
Essential Accessories for Optimal Use
To elevate your Krups espresso experience, several accessories are highly recommended. A quality tamper is crucial for consistent coffee puck density, impacting extraction. A milk frothing pitcher is essential for creating latte art and creamy cappuccinos. Descaling solution, as outlined in your manual, maintains machine health.
Consider a distribution tool for even coffee grounds. Cleaning brushes and cloths are vital for daily upkeep. A portafilter basket, potentially a bottomless one, can enhance control. Refer to your manual for recommended accessories specific to your model.
Warranty Information and Support
Krups provides warranties varying by model and region; consult your manual for details. Customer support is available online and by phone for assistance.
Understanding Your Krups Warranty
Krups espresso machine warranties typically cover defects in materials and workmanship for a specified period, often one or two years from the purchase date. Carefully review your product’s manual, as warranty terms can differ based on the model and your location.
The warranty usually requires proof of purchase. It doesn’t cover damage from misuse, improper cleaning (refer to the manual!), or unauthorized repairs. Registering your machine online can streamline the claims process. Understanding these details ensures you can effectively utilize your warranty if needed.
Contacting Krups Customer Support
Krups customer support is accessible through various channels for assistance with your espresso machine. Begin by consulting the comprehensive troubleshooting section within your machine’s manual. If issues persist, visit the official Krups website for FAQs and online chat options.
You can also reach them via phone; numbers are listed on their website, varying by region. Prepare your model number and purchase date for efficient service. Retaining your manual during the call is highly recommended.

Safety Precautions
Always read the manual before operating your Krups machine. Avoid hazards by understanding proper usage, hot surfaces, and electrical safety guidelines detailed within.
Important Safety Guidelines
Before first use, thoroughly review the Krups espresso machine manual for crucial safety information. Ensure the appliance is grounded correctly to prevent electrical shock. Never immerse the machine, cord, or plug in water or other liquids.
Always operate on a stable, level surface. Keep the machine away from flammable materials. Hot steam and water are present during operation – exercise extreme caution to avoid burns.
Unplug the machine when not in use and before cleaning. Allow it to cool completely before disassembly. Never operate the machine with a damaged cord or plug. Supervise children closely when the appliance is in use.
Avoiding Common Hazards
Consult the Krups espresso machine manual to understand potential hazards. Prevent burns by carefully handling hot components like the steam wand and brew group. Avoid operating the machine without water, as this can cause damage.
Never open the brew group during operation. Ensure proper ventilation to prevent overheating. Regularly check for leaks and address them promptly.
Do not attempt to repair the machine yourself; contact authorized service personnel. Improper use or modification can void the warranty and create safety risks. Always follow the manufacturer’s instructions.

Extending the Life of Your Krups Machine
Refer to the Krups espresso machine manual for detailed maintenance. Regular cleaning and descaling, as outlined, will maximize longevity and performance.
Proper Storage and Handling
Always consult your Krups espresso machine manual before long-term storage. Ensure the machine is thoroughly cleaned and descaled, removing any residual coffee grounds or water. Disconnect the power cord and store it separately. Protect the exterior with a soft cloth to prevent scratches.
Avoid storing in excessively humid or cold environments. If possible, store the machine in its original packaging. Handle with care during transport, avoiding drops or impacts. Proper handling prevents damage and ensures continued functionality when you’re ready to brew again.
Regular Maintenance Schedule
Refer to your Krups espresso machine manual for a detailed maintenance schedule. Daily, empty the drip tray and clean the brew group. Weekly, wipe down the exterior and clean the milk frother. Monthly, descale the machine using a descaling solution, following the manual’s instructions precisely.
Every three to six months, consider a deeper cleaning of internal components. Consistent adherence to this schedule, as outlined in the manual, maximizes the lifespan and performance of your espresso machine, ensuring consistently delicious coffee.