Brother LS-2125 Sewing Machine: A Comprehensive Guide
Unlock the full potential of your Brother LS-2125! This guide‚ alongside the 67-page manual‚ provides essential instructions for operation‚ maintenance‚ and troubleshooting.
Welcome to the world of sewing with the Brother LS-2125! This reliable and user-friendly machine is designed for both beginners and experienced sewists. The LS-2125 boasts 25 built-in stitch patterns‚ offering versatility for a wide range of projects‚ from simple alterations to creative garment construction.
Finding your machine’s manual is now easier than ever. If you’ve misplaced the original‚ readily available digital copies – in PDF format – can be downloaded online. These manuals‚ spanning 67 pages‚ are your comprehensive resource for everything LS-2125. They cover crucial aspects like safety precautions‚ detailed threading instructions‚ stitch selection guides‚ and troubleshooting common issues.
Whether you need to understand how to wind the bobbin‚ adjust stitch length‚ or diagnose a problem‚ the manual (and this guide!) will provide clear‚ step-by-step instructions. Don’t hesitate to consult pages 6‚ 10‚ 13‚ 15‚ 20‚ 22‚ 24‚ 25‚ and 32 for specific guidance. Mastering your LS-2125 starts with understanding its features and capabilities‚ all detailed within its comprehensive documentation.
Key Features and Specifications
The Brother LS-2125 is a 25-stitch function sewing machine celebrated for its ease of use and dependability. Key features include a variety of stitch options – straight‚ zigzag‚ and decorative – catering to diverse sewing needs. It’s a free-arm machine‚ facilitating cuff and sleeve work. The manual details each stitch’s application‚ found on page 20‚ aiding in project selection.
Specifications highlight its lightweight design‚ making it portable and convenient. The machine accommodates various fabric types‚ though the manual recommends testing on scraps first. It features adjustable stitch length and width‚ allowing for customization. Troubleshooting guidance on page 32 addresses common operational concerns.
The 67-page instruction manual provides a complete parts reference list (19 pages) and detailed diagrams. It’s a valuable resource for understanding the machine’s inner workings and performing basic maintenance. Owners can download the PDF manual for convenient access to safety instructions‚ product specifications‚ and frequently asked questions‚ ensuring optimal performance and longevity of their LS-2125.

Setting Up Your Machine
Prepare for successful sewing! The manual (pages 6‚ 10‚ 13‚ 15) guides you through connecting power‚ winding the bobbin‚ and expertly threading both upper and bobbin threads.
Connecting to Power
Ensuring a safe and reliable power connection is the first step to utilizing your Brother LS-2125 sewing machine. Before plugging in the machine‚ always verify that the power switch is in the “OFF” position. This precaution prevents accidental activation and potential damage. Locate the power cord input on the back of the machine – it’s typically a standard two-prong connector.
Plug the power cord securely into a properly grounded electrical outlet. The manual emphasizes using an outlet that matches the voltage requirements specified on the machine’s data plate (usually found on the underside). Never use a damaged power cord; if it’s frayed or shows any signs of wear‚ replace it immediately to avoid electrical shock hazards.
Once connected‚ double-check the connection to ensure it’s firm. The power switch‚ clearly labeled‚ should then be switched to the “ON” position. You’ll likely see an indicator light illuminate‚ confirming the machine is receiving power. Refer to page 6 of the instruction manual for a detailed diagram and further safety guidelines regarding the power connection. Remember‚ prioritizing safety during setup is crucial for a positive sewing experience.
Winding the Bobbin
Properly winding the bobbin is fundamental to achieving consistent stitch quality with your Brother LS-2125. Begin by placing a spool of thread onto the spool pin‚ securing it with the spool cap to prevent unwinding. Next‚ guide the thread through the thread guide‚ ensuring it’s properly seated; The manual details this process on page 10‚ with a helpful illustration.
Wrap the thread several times around the bobbin‚ manually‚ before engaging the bobbin winder. This initial wrapping helps secure the thread. Then‚ push the bobbin winder stem to the right and press the foot controller gently. The machine will automatically begin winding the bobbin. Avoid pressing the foot controller too hard‚ as this can cause uneven winding.
Once the bobbin is full‚ the winder will automatically stop. Cut the thread‚ remove the bobbin‚ and insert it into the bobbin case‚ ensuring it clicks into place. The manual provides clear instructions on bobbin insertion. A correctly wound bobbin is essential for smooth and reliable sewing. Always refer to the manual for detailed diagrams and troubleshooting tips related to bobbin winding.
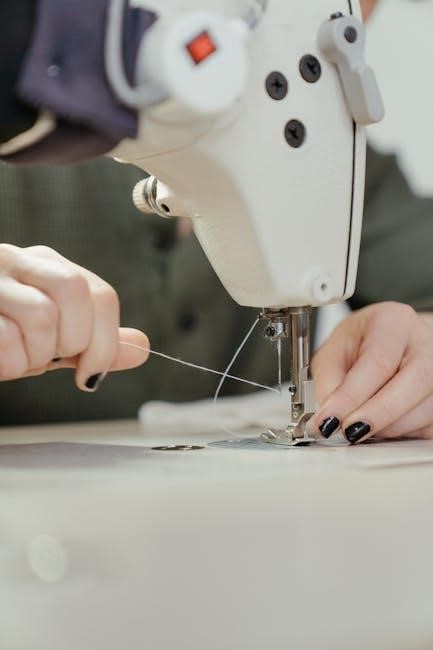
Threading the Upper Thread
Correct upper threading is crucial for the Brother LS-2125 to function optimally. Begin by ensuring the machine is turned off and the presser foot is raised. This releases the tension discs‚ allowing the thread to pass through easily. Refer to page 13 of the manual for a detailed threading diagram.
Start by guiding the thread through the first thread guide‚ then down and around the tension discs. Ensure the thread is securely seated between the discs – this is vital for proper tension. Next‚ thread the thread take-up lever‚ moving it to its highest position. Continue threading through the thread guide on the needle bar‚ and finally‚ thread the needle from front to back.
A needle threader can be incredibly helpful‚ especially for those with limited dexterity. Always use a needle appropriate for your fabric type and weight. Incorrect threading can lead to skipped stitches or thread breakage. Double-check each step against the manual’s illustration to guarantee accurate threading. Proper threading ensures smooth and consistent stitching.
Drawing Up the Bobbin Thread
Successfully drawing up the bobbin thread is essential before beginning to sew with your Brother LS-2125. After inserting the wound bobbin (refer to page 10 for bobbin winding instructions)‚ hold the upper thread loosely. Slowly turn the handwheel towards you‚ observing the needle as it descends and ascends.
As the needle goes down and up‚ it should catch the bobbin thread‚ bringing a loop of it up through the needle plate. Gently pull on the upper thread; this will draw the bobbin thread up completely. You may need to rotate the handwheel a few times to achieve this. Ensure both threads are trailing towards the back of the machine.
If the bobbin thread doesn’t come up‚ re-check that the bobbin is correctly inserted and that the upper thread is properly seated in the tension discs. Sometimes‚ a slight adjustment of the upper thread is all that’s needed. Refer to page 15 of the manual for further assistance. Correctly drawing up the bobbin thread ensures a secure and balanced stitch formation.
Basic Sewing Operations
Master fundamental techniques with your LS-2125! Select stitches (page 20)‚ adjust length/width (page 22)‚ position fabric‚ lower the presser foot‚ and utilize the foot controller (page 24).
Selecting Stitch Patterns
The Brother LS-2125 boasts 25 distinct stitch patterns‚ offering versatility for a wide range of sewing projects. To select your desired stitch‚ locate the stitch selection dial‚ typically found on the front of the machine. This dial is clearly marked with numbers corresponding to each available stitch.
Refer to the Stitch Selection Guide on page 20 of the manual for a visual representation of each stitch and its recommended applications. Common stitches include straight stitch‚ zigzag stitch‚ and various decorative stitches. Experiment with different stitches to achieve unique effects on your fabric.
Once you’ve identified the stitch you want to use‚ rotate the dial until the corresponding number aligns with the indicator mark. Ensure the dial clicks into place to confirm the selection. It’s crucial to understand that certain stitches may require adjustments to stitch length and width for optimal results. Always test the selected stitch on a scrap piece of fabric before beginning your project to ensure it meets your expectations. The manual provides detailed guidance on adjusting these settings for each stitch pattern‚ maximizing the creative potential of your LS-2125.
Adjusting Stitch Length and Width
Precise control over stitch length and width is essential for achieving professional-looking results with your Brother LS-2125. The machine features dedicated dials for adjusting each parameter independently. The stitch length dial‚ typically marked with measurements in millimeters‚ controls the distance between each stitch. Shorter stitch lengths are ideal for delicate fabrics and reinforcing seams‚ while longer lengths are suitable for basting or gathering.
The stitch width dial‚ often labeled with a range of numbers‚ determines the breadth of zigzag or decorative stitches. Wider settings create bolder patterns‚ while narrower settings offer more subtle effects. Refer to page 20 of the manual’s Stitch Selection Guide for recommended settings for each stitch pattern.
Always test your adjustments on a scrap fabric before sewing your project. Minor adjustments can significantly impact the final appearance and durability of your seams. Remember to consider the fabric type and weight when selecting stitch length and width. Experimentation is key to mastering these controls and unlocking the full creative potential of your LS-2125 sewing machine.
Placing Fabric and Lowering the Presser Foot
Proper fabric placement and securing it under the presser foot are crucial for accurate and consistent sewing with your Brother LS-2125. Begin by positioning your fabric under the presser foot‚ aligning the edge with the desired seam allowance guide on the needle plate. Ensure the fabric is flat and free of wrinkles or folds to prevent uneven stitching.
Gently lower the presser foot lever located at the back of the machine. This action clamps the fabric securely against the feed dogs‚ which advance the material during sewing. Never begin sewing before lowering the presser foot‚ as this can cause skipped stitches or damage to the machine.
For thicker fabrics or multiple layers‚ slightly lift the presser foot and carefully position the fabric before fully lowering it. Always double-check that the fabric is properly aligned and secured before operating the foot controller. Consistent pressure from the presser foot ensures even feeding and professional-quality seams. Refer to page 22 for detailed illustrations.
Operating the Foot Controller
The foot controller regulates the sewing speed of your Brother LS-2125‚ offering precise control over your projects. It functions as a variable speed pedal; gently pressing down initiates sewing‚ and the further you depress the pedal‚ the faster the machine operates. Begin with slow‚ controlled pressure to familiarize yourself with the responsiveness.
Avoid abrupt or forceful pressing‚ as this can lead to uneven stitching or potential damage. Practice maintaining a consistent speed for smooth‚ professional-looking seams. The foot controller allows for hands-free operation‚ freeing your hands to guide the fabric.
Always keep the foot controller clean and free of debris to ensure optimal performance. If the controller becomes unresponsive‚ check the connection to the sewing machine. For detailed guidance on using the foot controller effectively‚ and troubleshooting any issues‚ consult page 24 and 25 of the comprehensive instruction manual.
Backtacking and Reinforcing Seams
Backtacking secures the beginning and end of seams on your Brother LS-2125‚ preventing unraveling and ensuring durability. Utilize the reverse sewing lever – typically located on the left side of the machine – to engage backtacking. Push the lever forward to switch to reverse‚ and then gently depress the foot controller to sew backwards over the last few stitches.
Reinforcing seams involves backtacking at critical stress points‚ such as corners or areas subject to strain. This adds extra strength and prevents seam failure. Backtack several times at the start and finish of each seam‚ and at regular intervals along longer seams for added security.
Consistent backtacking length is crucial for a neat finish. Refer to page 25 of the manual for visual guidance on proper backtacking technique. Mastering this technique will significantly improve the longevity and quality of your sewing projects. Always test on scrap fabric first to perfect your backtacking.

Advanced Features & Techniques
Explore beyond basics! Utilize diverse presser feet (refer to manual) and the stitch selection guide (page 20) for creative projects. Troubleshoot issues using page 32.
Using Different Presser Feet (Refer to Manual)
Expanding your sewing capabilities with the Brother LS-2125 hinges on understanding and utilizing its range of presser feet. The standard zig-zag foot‚ included with the machine‚ is versatile for most fabrics and stitch patterns. However‚ specialized feet unlock a world of possibilities.
For example‚ a buttonhole foot simplifies creating perfectly sized buttonholes‚ a feature crucial for garment construction. A zipper foot allows for precise stitching close to zipper teeth‚ ensuring professional-looking results. Furthermore‚ a blind hem foot creates nearly invisible hems‚ ideal for skirts and trousers.
The Brother LS-2125 manual is your definitive resource for identifying each presser foot and its specific application. It details the correct foot to use for various fabrics – from delicate silks to heavy denim – and stitch types. Incorrect foot selection can lead to skipped stitches‚ fabric puckering‚ or damage to the machine.
Always ensure the correct foot is securely attached before beginning a project. Experimenting with different feet will dramatically enhance your sewing skills and allow you to tackle more complex projects with confidence. Remember to consult the manual for detailed instructions and safety precautions related to each presser foot.
Understanding Stitch Selection Guide (Page 20)
Page 20 of your Brother LS-2125 manual unveils the comprehensive stitch selection guide‚ a key to unlocking the machine’s 25 built-in stitch patterns. This guide isn’t merely a list; it’s a visual reference detailing each stitch’s ideal application.
You’ll find stitches categorized by function: straight stitch for basic seams‚ zig-zag for finishing raw edges and creating stretch seams‚ and decorative stitches for embellishment. The guide illustrates the stitch appearance and suggests suitable fabrics and projects. Understanding these nuances is crucial for achieving professional results.
Pay close attention to the stitch length and width recommendations provided alongside each pattern. These settings significantly impact the stitch’s appearance and strength. For instance‚ a longer stitch length is suitable for heavier fabrics‚ while a shorter length is ideal for delicate materials.
Experimenting with different stitch patterns and settings is encouraged‚ but always test on a scrap fabric first. The stitch selection guide empowers you to choose the optimal stitch for every sewing task‚ maximizing the versatility of your Brother LS-2125. Refer to it frequently as you expand your sewing repertoire.
Troubleshooting Common Issues (Page 32)
Page 32 of the Brother LS-2125 manual is dedicated to resolving frequently encountered sewing problems‚ a vital resource for maintaining smooth operation. It addresses issues like thread bunching‚ skipped stitches‚ and needle breakage – common frustrations for both beginners and experienced sewers.
The troubleshooting section provides a systematic approach to diagnosis. It doesn’t just state the problem; it outlines potential causes and step-by-step solutions. For example‚ thread bunching is often linked to improper threading or incorrect tension settings. The manual guides you through re-threading and adjusting the tension dials.

Skipped stitches are frequently caused by a bent or dull needle‚ or incorrect needle size for the fabric. The guide emphasizes the importance of using the correct needle type and replacing it regularly. It also covers issues related to the presser foot and timing.
Before seeking professional repair‚ carefully review the troubleshooting section. Many common problems can be easily resolved with a little patience and the guidance of your LS-2125 manual. Remember safety first – always unplug the machine before attempting any repairs.
Maintenance and Care
Regular cleaning and care‚ as detailed in the manual‚ ensure longevity. Prioritize safety precautions outlined on page 32‚ and consult the manual for lubrication guidance.
Cleaning the Machine
Maintaining a clean sewing machine is crucial for optimal performance and longevity of your Brother LS-2125. Dust‚ lint‚ and stray threads can accumulate within the machine‚ hindering smooth operation and potentially causing damage. The comprehensive manual provides detailed instructions‚ but here’s a general guide.
Always disconnect the power cord before commencing any cleaning procedures. Begin by removing the needle and the bobbin case. Use a soft brush – often included with the machine – to gently remove lint from the bobbin area‚ feed dogs‚ and around the needle plate. A small vacuum cleaner with a brush attachment can also be helpful for removing stubborn lint.
For more thorough cleaning‚ a slightly dampened (not wet!) cloth can be used to wipe down the exterior surfaces of the machine. Avoid using harsh chemicals or abrasive cleaners‚ as these can damage the finish. Pay particular attention to areas where oil may accumulate. Regularly cleaning the machine prevents build-up and ensures consistent stitch quality. Refer to page 32 of the manual for specific safety guidelines and detailed cleaning instructions tailored to your Brother LS-2125 model.
Lubrication (If Applicable ─ Check Manual)
Proper lubrication is vital for the smooth and efficient operation of your Brother LS-2125 sewing machine‚ but it’s crucial to determine if your model requires it. Modern sewing machines‚ including many Brother models‚ are often designed to be self-lubricating and may not necessitate manual oiling.
Always consult your LS-2125 instruction manual (page 32 and beyond) before attempting any lubrication. The manual will explicitly state whether oiling is required and‚ if so‚ which specific parts need attention. Using the wrong type of oil or applying it incorrectly can cause more harm than good‚ leading to sticky mechanisms or staining.
If lubrication is recommended‚ use only sewing machine oil specifically designed for this purpose. Apply a small drop to the designated points – typically the bobbin race and hook area – as illustrated in the manual. Avoid over-oiling‚ as excess oil can attract dust and lint. After oiling‚ run the machine briefly to distribute the lubricant evenly. Remember‚ preventative maintenance‚ guided by the manual‚ extends the life of your LS-2125.
Safety Precautions (Refer to Manual)
Prioritizing safety is paramount when operating your Brother LS-2125 sewing machine. The comprehensive 67-page instruction manual contains crucial safety guidelines that must be reviewed before initial use and periodically thereafter. Ignoring these precautions could lead to injury or damage to the machine.
Key safety points include keeping fingers away from the needle while the machine is running‚ always disconnecting the power supply before threading‚ cleaning‚ or changing parts‚ and never forcing the fabric under the needle. Ensure the machine is placed on a stable‚ level surface during operation.
The manual also details precautions regarding electrical safety‚ emphasizing the importance of using a properly grounded outlet and avoiding operation in damp environments. Never attempt to repair the machine yourself; instead‚ contact a qualified technician. Children should never be allowed to operate the LS-2125 unsupervised. Refer to pages 32 and throughout the manual for a complete understanding of all safety measures. Your well-being and the longevity of your machine depend on adherence to these guidelines.
Accessing the Full Manual (67 Pages)
For a complete understanding of your Brother LS-2125 sewing machine‚ accessing the full 67-page instruction manual is essential. This detailed resource provides in-depth guidance on all aspects of operation‚ maintenance‚ and troubleshooting‚ far exceeding the scope of this quick guide.
Numerous online resources offer downloadable PDF versions of the manual. A quick search for “Brother LS-2125 instruction manual” will yield several options‚ including direct links to Brother’s support website and third-party repositories. Be sure to download from a reputable source to ensure the file is safe and complete.
The manual covers everything from initial setup and threading to advanced techniques and detailed parts diagrams. It also includes crucial safety information and troubleshooting tips for common issues. Whether you’ve lost your original copy or simply prefer a digital version‚ having access to the full manual will empower you to maximize the potential of your LS-2125. Don’t hesitate to consult it frequently – it’s your ultimate companion for successful sewing!