Article Plan: Arrow 8×10 Metal Shed Instructions
This comprehensive guide details the assembly of an Arrow 8×10 metal shed‚ covering everything from unboxing to maintenance‚
and even account linking troubleshooting for related platforms.
It addresses potential issues like cross-save complications‚ platform unlinking‚ and ensuring a secure‚ long-lasting storage solution.
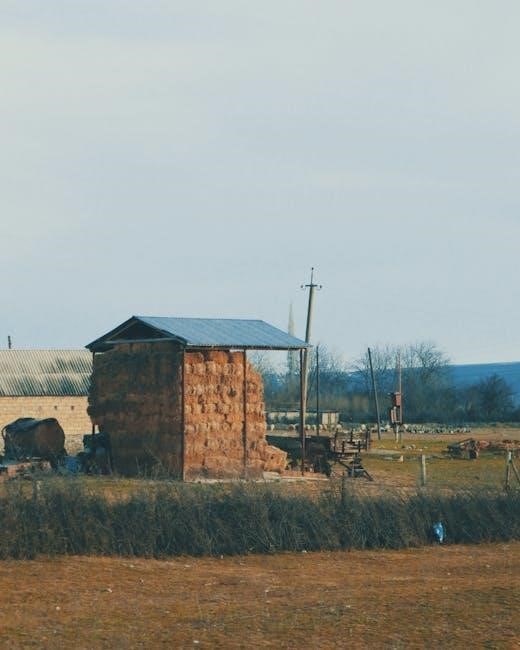
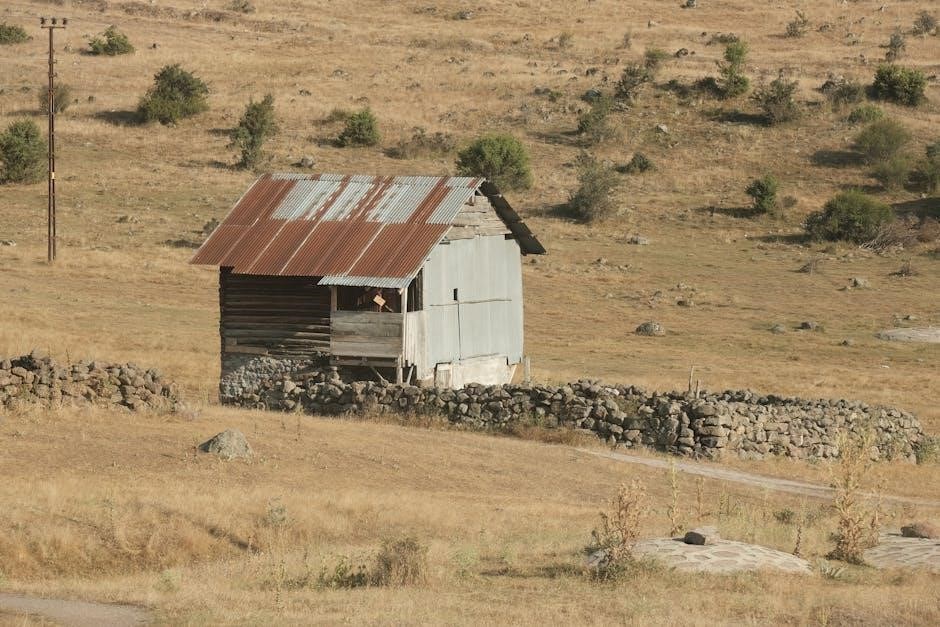
The Arrow 8×10 metal shed is a popular choice for homeowners seeking durable and affordable outdoor storage. This shed offers a substantial amount of space – 80 square feet – ideal for gardening tools‚ lawn equipment‚ seasonal decorations‚ or workshop materials.
Its galvanized steel construction provides resistance to rust and corrosion‚ ensuring longevity. However‚ proper assembly is crucial for maximizing its lifespan and structural integrity. This guide provides a step-by-step approach‚ covering everything from site preparation and foundation building to final anchoring and maintenance.
Understanding the process‚ and potential account linking issues related to platform access‚ will ensure a smooth and successful shed-building experience.
Unboxing and Inventory
Upon delivery‚ carefully inspect the Arrow 8×10 metal shed packaging for any signs of damage during transit. Document any issues with photos before opening. Once opened‚ lay out all components and cross-reference them with the parts list included in the manual.
This meticulous inventory is vital; missing parts can halt the assembly process. Separate hardware (screws‚ bolts‚ etc.) into labeled containers for easy access. Pay close attention to panel identification – often labeled with stickers or markings.
Confirm you have all roof sheets‚ wall panels‚ and foundation components before proceeding‚ avoiding potential delays and frustration; Account linking isn’t relevant here‚ focus on the physical inventory.
Site Preparation
Proper site preparation is crucial for a stable and long-lasting Arrow 8×10 metal shed. Begin by clearing the chosen area of all vegetation‚ rocks‚ and debris. Ensure the site is larger than the shed’s footprint‚ allowing ample working space around the perimeter.
Check for underground utilities before digging‚ contacting your local authorities if necessary. Consider drainage; avoid areas prone to water accumulation. A level site is paramount‚ requiring careful assessment and potential leveling work.
This stage doesn’t involve account linking or troubleshooting; it’s purely physical preparation for a solid foundation. A well-prepared site prevents future structural issues.
Choosing a Level Location
Selecting a level location is paramount for your Arrow 8×10 metal shed’s stability. Even a slight slope can cause significant issues during assembly and long-term use. Utilize a long level and straight edge to assess the ground’s flatness across the intended shed area.
Avoid low-lying areas prone to water pooling‚ as this can lead to rust and foundation problems. Consider the surrounding terrain and potential drainage patterns. A naturally level spot minimizes the need for extensive ground preparation.
This step is independent of account management or cross-save features; it focuses solely on the physical site’s suitability.
Foundation Options (Concrete‚ Gravel‚ Wood)
Several foundation options exist for your Arrow 8×10 shed‚ each with pros and cons. A concrete slab provides the most durable and level base‚ but requires significant effort and cost. Gravel foundations are more affordable and offer good drainage‚ though leveling is crucial.
Wooden skid foundations are a simpler alternative‚ utilizing pressure-treated lumber to create a raised platform. This option is best suited for relatively level ground. Remember‚ this foundation choice is unrelated to Destiny 2 account linking or cross-save functionality.
Carefully assess your site conditions and budget when selecting the appropriate foundation.
Foundation Construction
Regardless of your chosen foundation‚ proper construction is vital. For concrete‚ ensure accurate measurements and a level pour‚ allowing sufficient curing time before assembly. Gravel foundations require excavating to the desired depth‚ adding landscape fabric for weed control‚ and compacting the gravel thoroughly in layers.
Wooden skid foundations demand precise cuts and secure connections using galvanized hardware. Always use pressure-treated lumber rated for ground contact. This step is independent of any Destiny 2 account management‚ like cross-save or platform unlinking.
Double-check all dimensions and ensure the foundation is square before proceeding.
Gravel Base Installation
Begin by excavating the area to a depth of approximately 6 inches‚ extending slightly beyond the shed’s dimensions. Lay down a layer of landscape fabric to prevent weed growth and material mixing. This is a crucial step for a stable‚ long-lasting base‚ unrelated to Destiny 2’s cross-save features or account linking.
Next‚ add gravel in layers‚ typically 4-6 inches‚ compacting each layer thoroughly with a plate compactor. Ensure the base is level across the entire area. Proper compaction is essential to prevent settling and maintain shed stability.
A well-prepared gravel base provides excellent drainage and a solid foundation for your Arrow 8×10 shed.
Wooden Skid Foundation
Constructing a wooden skid foundation involves pressure-treated lumber‚ typically 4x4s or 6x6s‚ creating a rectangular frame slightly larger than the shed’s base. Ensure the wood is rated for ground contact to resist rot and insect damage – this is separate from any account management issues.
Level the ground where the skids will rest‚ using shims if necessary. Securely fasten the lumber together using galvanized screws or bolts. The skids elevate the shed‚ improving airflow and preventing direct contact with moisture.
This method offers a simpler alternative to concrete‚ providing a stable and relatively inexpensive foundation for your Arrow 8×10 shed.
Frame Assembly ౼ Base Rails
Begin by laying out the base rails according to the shed’s blueprint‚ ensuring correct orientation. These rails form the foundation for the walls‚ so precision is key. Connect the rails using the provided hardware – typically self-tapping screws – tightening them securely.
Double-check that the frame is square before proceeding; a slightly off-kilter base will cause issues later. Use a framing square to verify 90-degree angles at each corner. This step is independent of any cross-save or account linking concerns.
The assembled base rails provide a rigid structure for attaching the wall panels‚ ensuring the shed’s overall stability.
Wall Panel Installation
Carefully lift and position the first wall panel onto the assembled base rails‚ aligning it with the pre-drilled holes. Secure the panel using the provided screws‚ ensuring a flush fit against the base. Repeat this process for the remaining wall panels‚ working systematically around the shed’s perimeter.
Pay close attention to panel orientation‚ as some may be specifically designed for certain locations. Avoid over-tightening the screws‚ which could damage the metal. This stage doesn’t relate to Destiny 2 account management or cross-save features.
Proper wall panel installation is crucial for the shed’s structural integrity and weather resistance.
Identifying Wall Panels
Before beginning installation‚ carefully unpack and identify each wall panel. Refer to the parts list in your Arrow 8×10 shed manual to match panel numbers with their corresponding positions. Look for subtle differences in panel design‚ such as pre-cut openings for doors or vents‚ or variations in ribbing patterns.
Some panels may be designated for specific sides (left‚ right‚ front‚ back) of the shed. Incorrect panel placement can lead to alignment issues later in the assembly process. This step is independent of any account linking or cross-save considerations.
Proper identification ensures a smooth and accurate build.
Attaching Panels to the Base
With the base rails assembled and level‚ begin attaching the wall panels. Typically‚ this involves aligning the panel’s bottom edge with the base rail and securing it using self-tapping screws provided in the kit. Ensure the panels are flush with the base and square to each other before fully tightening the screws.
Start with the corner panels‚ then proceed to the intermediate panels. Work methodically around the perimeter‚ maintaining consistent alignment. This process is independent of any account linking or cross-save features.
Proper attachment is crucial for structural integrity.
Roof Frame Assembly
Once the wall panels are secure‚ begin assembling the roof frame. This usually involves connecting rafters – the angled beams supporting the roof – to the top of the wall panels. Refer to the diagram in your instruction manual for the correct rafter placement and orientation.
Use the provided hardware to firmly attach each rafter‚ ensuring a snug fit. This step doesn’t relate to Destiny 2 account management‚ like cross-save or platform unlinking.
A stable roof frame is essential for withstanding weather conditions.
Rafter Installation
Rafter installation is a critical step in roof frame assembly. Carefully position each rafter‚ aligning it with the pre-drilled holes on the wall panels and the ridge beam (if applicable). Securely fasten the rafters using the screws or bolts provided‚ ensuring they are tightened adequately but not over-tightened to avoid stripping the metal.
Double-check that all rafters are aligned and evenly spaced for a structurally sound roof. This process is independent of any account linking or cross-save features found in gaming platforms.
Proper rafter installation prevents leaks and ensures roof stability.
Roof Support Braces
Roof support braces significantly enhance the structural integrity of your Arrow 8×10 shed’s roof. These braces‚ typically metal or wood‚ are installed diagonally between the rafters and the frame to prevent sagging and increase resistance to wind and snow loads. Securely attach the braces using the provided hardware‚ ensuring a snug fit at both connection points.

Proper bracing is crucial for long-term stability‚ independent of any digital account management systems. Consistent spacing and secure fastening are key.
This step contributes to a durable and reliable shed roof.
Roofing Installation
Roofing installation is a critical phase‚ demanding precision for weather protection. Begin by carefully positioning the first roof sheet‚ aligning it with the roof frame edges. Secure it using the provided screws‚ ensuring they penetrate both the sheet and the underlying rafters. Overlap subsequent sheets according to the manufacturer’s instructions‚ typically a specified number of corrugations.
Consistent overlap prevents water ingress‚ unrelated to any cross-save or account linking issues. Work systematically across the roof‚ maintaining alignment and secure fastening.
A properly installed roof safeguards your shed’s contents.
Attaching Roof Sheets
Securely attaching roof sheets is paramount for a weatherproof shed. Start with the lowest row‚ ensuring proper overhang on all sides for effective water runoff. Utilize the provided self-tapping screws‚ specifically designed for metal roofing‚ and a drill with a suitable bit. Pre-drilling can prevent buckling‚ especially with thinner gauge sheets.
Maintain consistent screw spacing as outlined in the shed’s manual – typically every few corrugations. Avoid over-tightening‚ which can strip the screw holes. This process is independent of any account management‚ like cross-save or platform unlinking.
Proper attachment guarantees a durable roof.
Sealing Roof Seams
After roof sheet installation‚ sealing seams is crucial for preventing leaks. Apply a high-quality‚ weatherproof sealant specifically formulated for metal roofing along all overlapping seams and around screw heads. This creates a watertight barrier against rain and snow‚ extending the shed’s lifespan.
Pay close attention to the ridge cap and gable ends‚ as these are common entry points for water. Ensure the sealant is compatible with the roof sheet material to avoid corrosion. This step is unrelated to Destiny 2 account issues like cross-save or platform unlinking.
Thorough sealing ensures a dry interior.
Door Installation
Door installation requires careful alignment for smooth operation. Begin with the door frame assembly‚ ensuring it’s square and level within the door opening. Attach the door hinges securely to both the door and the frame‚ using the provided hardware. Verify proper swing direction before fully tightening.
Adjust hinge placement if needed to eliminate binding or gaps. This process is distinct from Destiny 2’s account management‚ such as cross-save or platform unlinking. Proper installation prevents drafts and enhances security. Test the door’s latching mechanism for reliable closure.
A well-installed door is essential.
Door Frame Assembly
Begin door frame assembly by laying out all components on a protected surface. Carefully connect the side and top pieces‚ utilizing the provided screws and brackets. Ensure the frame is perfectly square before fully tightening the fasteners; a square frame is crucial for proper door function.
Double-check all connections for stability and alignment. This step is independent of Destiny 2’s account linking or cross-save features. A robust frame provides essential support for the door and its hardware. Pre-drilled holes should align seamlessly‚ simplifying the process.
A solid frame is key.
Door Hinge Attachment
Carefully position the hinges on both the door and the assembled door frame. Utilize the provided screws‚ ensuring they are appropriately sized for a secure hold. Pre-drilling pilot holes can prevent splitting the metal‚ especially with older shed models. Align the hinges perfectly to guarantee smooth door operation.
Tighten the screws gradually‚ avoiding over-tightening which could strip the threads. Test the door’s swing after attaching each hinge. This process is unrelated to Destiny 2’s account management systems. Proper hinge placement is vital for a functional and long-lasting shed door.
Ensure a smooth swing.
Vent Installation
Locate the pre-cut openings‚ typically near the roofline or gable ends‚ designed for ventilation. Carefully insert the vent components‚ ensuring a snug fit to prevent water ingress. Secure the vents using the provided screws or fasteners‚ again pre-drilling pilot holes is recommended. Proper ventilation is crucial for preventing condensation and maintaining a dry interior.
Check for any gaps around the vent perimeter and seal them with appropriate sealant. This step is independent of cross-save features or account unlinking processes. Adequate airflow protects stored items from moisture damage. Ensure proper placement for optimal performance.
Confirm a secure fit.
Securing the Shed ‒ Anchoring
Anchoring your Arrow 8×10 shed is vital for stability‚ especially in windy conditions. Utilize the provided anchor kits‚ designed for your specific shed model. Follow the instructions carefully‚ typically involving ground stakes or concrete anchors. Ensure proper placement according to local building codes and wind zone requirements.
This step is independent of Destiny 2’s cross-save or account unlinking features. Secure anchoring prevents shifting and potential damage. Regularly inspect the anchors for corrosion or loosening. Properly secured sheds offer long-term durability and peace of mind.
Confirm a secure fit.
Cross Save and Account Linking (Destiny 2 Context ‒ Relevant to User Account Management)
While seemingly unrelated to shed construction‚ understanding account linking mirrors managing access to your shed’s contents. Destiny 2’s Cross Save allows character access across platforms – like accessing tools stored in your shed from different “locations”. Unlinking accounts (Xbox‚ PlayStation‚ Steam) requires caution‚ similar to controlling who has a shed key.
Bungie’s policies‚ including 90-day security lockouts‚ highlight the importance of secure access. Character ownership remains tied to the original platform (Xbox)‚ just as the shed’s foundation is permanent. Proper account management ensures your “progress” isn’t lost.
Platform Account Unlinking (Destiny 2 Context ౼ Relevant to Account Management)
Similar to modifying access to your Arrow shed‚ Destiny 2’s platform unlinking requires careful steps. Disconnecting an Xbox account via Discord Connections mirrors removing a user’s shed key. Confirming the disavowal is crucial‚ like verifying a lock change. Re-linking necessitates a deliberate process‚ akin to rebuilding a shed’s doorframe.
Bungie’s March 25th‚ 2025 updates emphasize controlled access. Xbox characters remain tied to Xbox accounts‚ like the shed’s base being fixed to the ground. Understanding these limitations prevents accidental loss‚ mirroring proper shed anchoring.
Cross Save Troubleshooting (Destiny 2 Context ౼ Account Access Issues)
Like diagnosing issues with a shed’s structural integrity‚ Destiny 2’s Cross Save can present challenges. Accessing seasonal content on different platforms requires purchasing it separately‚ similar to needing separate shed accessories. Re-linking a PlayStation account to utilize Xbox characters mirrors rebuilding a shed door if it’s damaged.
Bungie.net serves as the central hub for account management‚ like a shed’s master plan. Stadia account holders need to purchase seasons for other platforms‚ akin to adding a separate roof to the shed. Troubleshooting often involves verifying connections.
Maintaining Your Arrow Shed
Regular maintenance extends your Arrow shed’s lifespan‚ much like consistent care preserves valuable Destiny . Rust prevention is crucial; applying protective coatings mirrors safeguarding against account bans. General cleaning removes debris‚ preventing structural issues‚ similar to clearing a cluttered digital inventory.
Inspect for loose screws and panels annually‚ akin to verifying Cross Save connections. Address any damage promptly to avoid further deterioration‚ like quickly resolving account access problems. A well-maintained shed provides years of reliable storage‚ just as a secure account protects your digital assets.
Rust Prevention
Rust is the primary enemy of metal sheds‚ demanding proactive measures. Regularly inspect the shed’s exterior for any signs of corrosion‚ similar to checking Destiny 2 account status. Apply a rust-inhibiting primer before painting‚ creating a protective barrier. Use exterior-grade paint specifically designed for metal surfaces‚ ensuring longevity.
Address scratches and chips immediately to prevent rust from taking hold‚ mirroring quick responses to account unlinking issues. Consider a galvanized steel shed for enhanced rust resistance. Annual inspections and touch-ups will maintain the shed’s integrity‚ much like safeguarding your digital profile.
General Cleaning
Regular cleaning extends your Arrow shed’s lifespan‚ preventing buildup that can accelerate corrosion – akin to maintaining a Destiny 2 account. Wash the exterior with mild soap and water at least twice yearly‚ removing dirt and debris. Avoid abrasive cleaners that could damage the protective coating. Inspect the roof for leaves and branches‚ clearing them to prevent water damage.
Sweep the interior frequently to remove dust and potential moisture sources. Check door mechanisms for smooth operation‚ similar to verifying cross-save functionality. Address any mold or mildew promptly with appropriate cleaners‚ ensuring a dry and secure storage space.
Safety Precautions During Assembly
Prioritize safety during Arrow shed assembly‚ treating it with the seriousness of securing a Destiny 2 account. Always wear safety glasses and gloves to protect against metal edges and debris. Work on a level surface to prevent the shed from collapsing – much like a stable platform for gaming. Use a sturdy ladder and have a helper assist with lifting heavier panels.
Be mindful of pinch points during frame assembly. Avoid working in windy conditions that could cause materials to shift. Disconnect power tools when not in use‚ and read all instructions carefully before beginning each step.
Common Assembly Issues and Solutions
Panel alignment problems are frequent; ensure the base is perfectly level‚ similar to optimizing a Destiny 2 build. Missing parts? Double-check the inventory list and contact Arrow for replacements. Stripped screws? Use slightly larger screws or wood glue for reinforcement. Door misalignment? Adjust the hinges carefully‚ ensuring they’re securely fastened.
Roof leaks can occur if seams aren’t properly sealed – apply silicone caulk. If cross-save issues arise‚ remember the 90-day lockout period. Always consult the manual and online resources for specific solutions.
Warranty Information
Arrow sheds typically come with a limited warranty‚ covering manufacturing defects in materials and workmanship. The warranty period varies – often 12 years on steel components‚ but check your specific documentation. This doesn’t cover damage from improper installation‚ misuse‚ or natural disasters.
Keep your proof of purchase for warranty claims‚ similar to tracking Destiny 2 seasonal content purchases. Modifications void the warranty‚ so maintain the original structure. Contact Arrow’s customer support for claim procedures and detailed warranty terms.
Assembling your Arrow 8×10 metal shed requires patience and precision‚ but yields a durable storage solution. Proper site preparation and following instructions carefully are crucial for longevity‚ much like maintaining cross-save functionality in Destiny 2. Regular maintenance‚ including rust prevention‚ will extend its lifespan.
Remember safety precautions throughout the process. Addressing potential issues proactively – like anchoring – ensures stability. Enjoy your new shed and the organized space it provides‚ knowing you’ve built a reliable structure!